
How to add columns in Google Sheets
When you enter data into a spreadsheet, you may need to make room for more. You might want to insert one or more columns to include additional data. We’ll show you how to add columns in Google Sheets, including how to insert a single column to the left or right and how to add multiple columns to your sheet.
Add a single column in Google Sheets
Visit Google Sheets, sign in with your Google account, and open the workbook to the sheet you want to use.
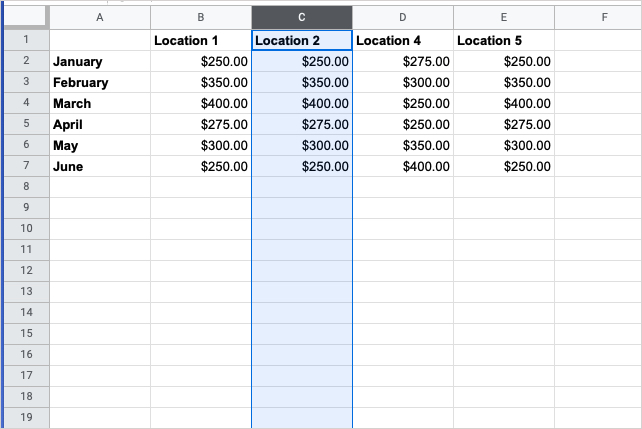
Step 1: Choose a column adjacent to the one you want to add. You can do this by selecting the column header.
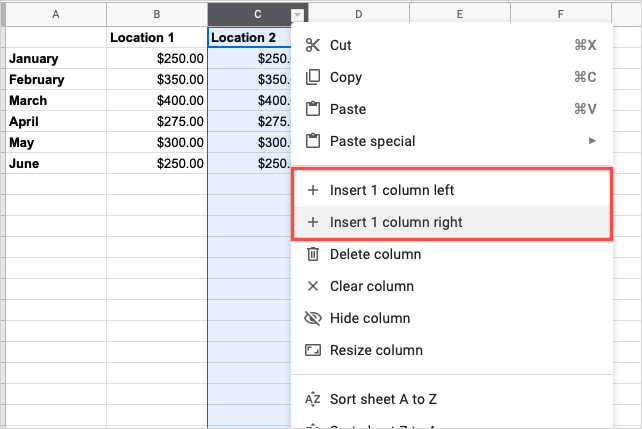
As an example, we want to insert a column between columns C and D, so we choose column C.
Step 2: Select the Arrow on the right side of the column header to display the drop-down menu.
Step 3: Pick Insert 1 column left or Insert 1 column right, depending on where you want the column. Using our example, we pick Insert 1 column right.
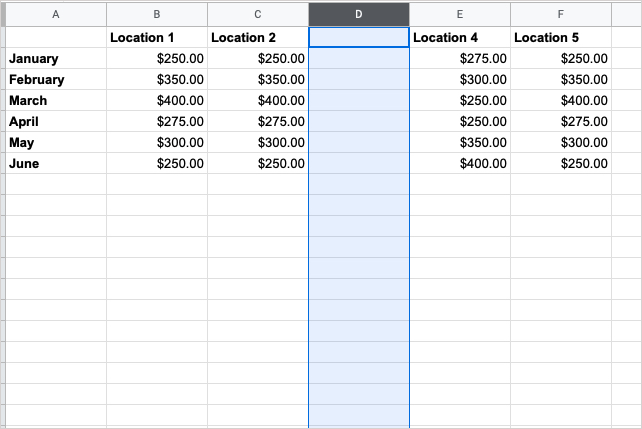
Step 4: You’ll then see a blank column inserted into the spot you selected.
Alternatively, you can select Insert from the menu or right-click the adjacent column. Then, choose Insert 1 column left or Insert 1 column right.
Add multiple columns in Google Sheets
You certainly don’t have to add just one column at a time if you need to insert more. You can add multiple columns at once just as easily.
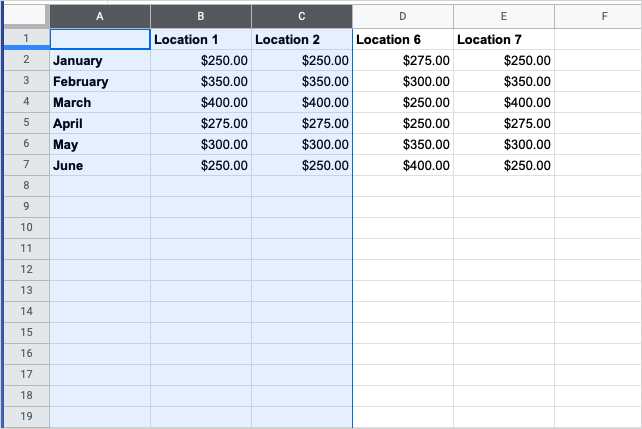
Step 1: Select the number of columns you want to insert. You can do this by selecting the first column and dragging through the remaining ones.
For example, we want to add three columns between columns C and D, so we select columns A, B, and C.
Step 2: Select the Arrow on the right side of one of the column headers in the group to display the drop-down menu.
Step 3: Pick Insert 3 columns left or Insert 3 columns right, depending on where you want the columns. Google Sheets automatically enters the number of columns you have selected in the drop-down menu.
Using our example, we pick Insert 3 columns right.

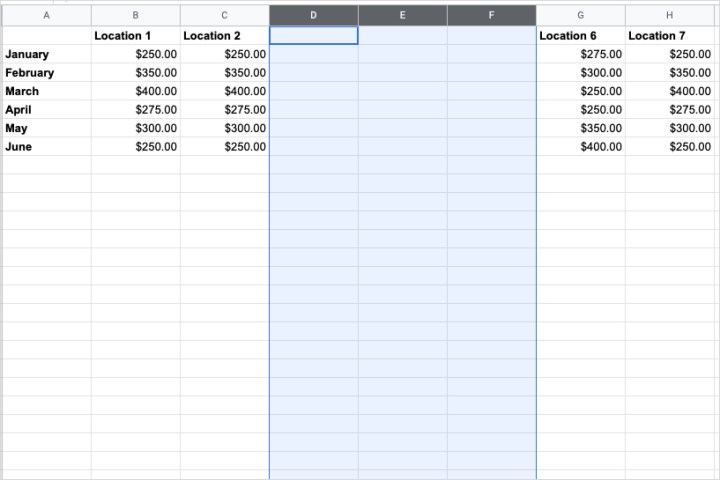
Step 4: You’ll then see blank columns added per the number of columns you selected.
Alternatively, you can select Insert from the menu or right-click the group of columns. Then, choose Insert 3 columns left or Insert 3 columns right.
Now that you know how to add columns in Google Sheets, take a look at how to lock cells or how to merge cells in your spreadsheet.
Editors’ Recommendations
When you enter data into a spreadsheet, you may need to make room for more. You might want to insert one or more columns to include additional data. We’ll show you how to add columns in Google Sheets, including how to insert a single column to the left or right and how to add multiple columns to your sheet.
Add a single column in Google Sheets
Visit Google Sheets, sign in with your Google account, and open the workbook to the sheet you want to use.
Step 1: Choose a column adjacent to the one you want to add. You can do this by selecting the column header.
As an example, we want to insert a column between columns C and D, so we choose column C.
Step 2: Select the Arrow on the right side of the column header to display the drop-down menu.
Step 3: Pick Insert 1 column left or Insert 1 column right, depending on where you want the column. Using our example, we pick Insert 1 column right.
Step 4: You’ll then see a blank column inserted into the spot you selected.
Alternatively, you can select Insert from the menu or right-click the adjacent column. Then, choose Insert 1 column left or Insert 1 column right.
Add multiple columns in Google Sheets
You certainly don’t have to add just one column at a time if you need to insert more. You can add multiple columns at once just as easily.
Step 1: Select the number of columns you want to insert. You can do this by selecting the first column and dragging through the remaining ones.
For example, we want to add three columns between columns C and D, so we select columns A, B, and C.
Step 2: Select the Arrow on the right side of one of the column headers in the group to display the drop-down menu.
Step 3: Pick Insert 3 columns left or Insert 3 columns right, depending on where you want the columns. Google Sheets automatically enters the number of columns you have selected in the drop-down menu.
Using our example, we pick Insert 3 columns right.
Step 4: You’ll then see blank columns added per the number of columns you selected.
Alternatively, you can select Insert from the menu or right-click the group of columns. Then, choose Insert 3 columns left or Insert 3 columns right.
Now that you know how to add columns in Google Sheets, take a look at how to lock cells or how to merge cells in your spreadsheet.
Editors’ Recommendations
Denial of responsibility! Techno Blender is an automatic aggregator of the all world’s media. In each content, the hyperlink to the primary source is specified. All trademarks belong to their rightful owners, all materials to their authors. If you are the owner of the content and do not want us to publish your materials, please contact us by email – [email protected]. The content will be deleted within 24 hours.