
How to make a contact group on an iPhone
iPhone has a bunch of cool features, but few are as useful as contact groups. As of iOS 16, Apple lets you pool contacts together into groups, making it easy to spam out messages to family, friends, or colleagues without needing to tinker with a bunch of clunky settings. You don’t even need any extra software or apps – as long as you’re running iOS 16 or later, you can quickly make a contact group on your iPhone.
In this guide, we’ll show you exactly how to create a contact group on your iPhone, how to send messages to that group, and how to remove contacts or delete groups from your phone.
How to create a contact group on your iPhone
When you create a new contact group, you can add as many contacts as you want. And the steps for doing so are as follows:
Step 1: On the iPhone home screen, tap on the Contacts app. You can also get there by tapping on the Phone app, then selecting Contacts at the bottom.
Image used with permission by copyright holder
Step 2: Tap Lists at the top left.
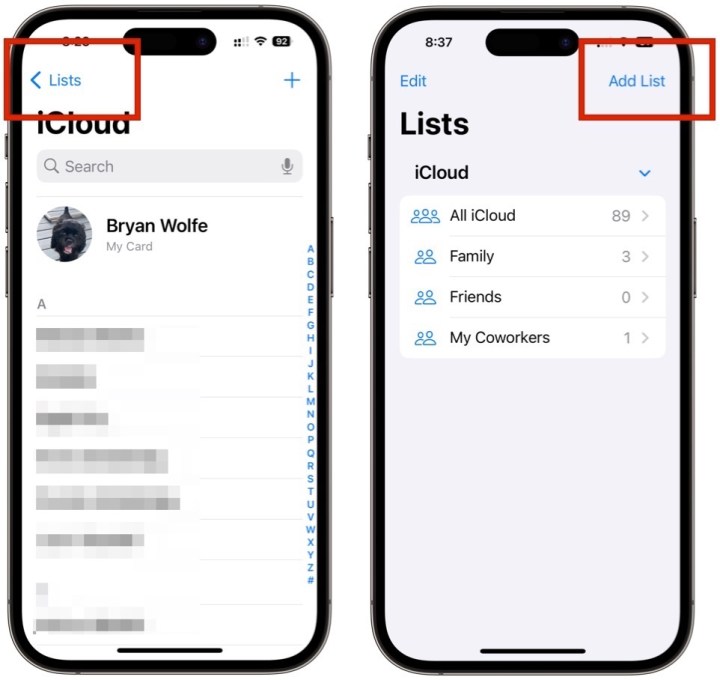
Image used with permission by copyright holder
Step 3: Next, tap Add List at the top right.
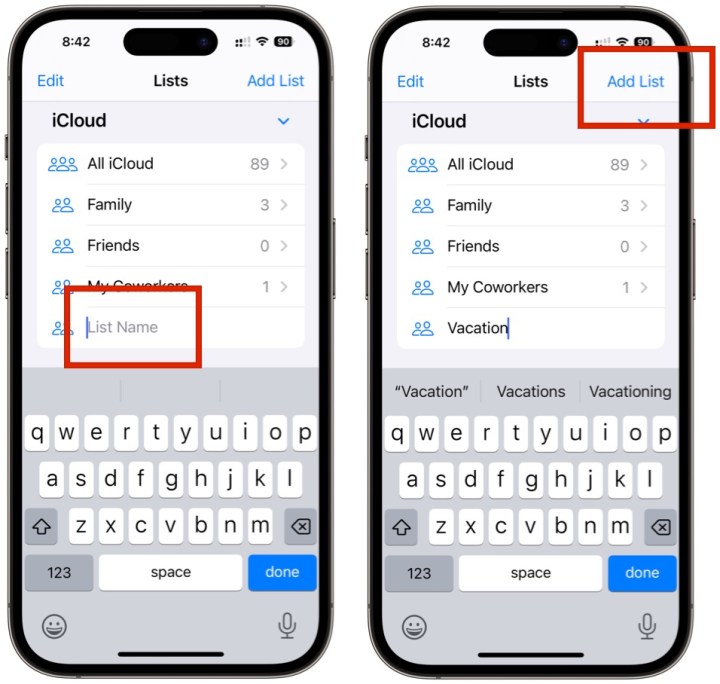
Image used with permission by copyright holder
Step 4: In the newly formed box, type the List Name. Tap Add List at the top right.
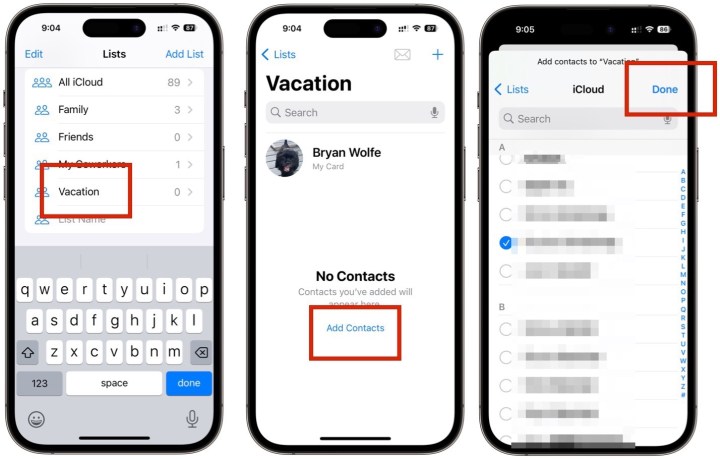
Image used with permission by copyright holder
Step 5: On the Lists page, choose the list you just created. Tap Add Contacts. Choose every contact you wish to add to the list. When finished, tap Done at the top right.
How to send a message to your contact group
With your contact group created, you’re now ready to send messages to your group. Here’s how it works:
Step 1: Go back into the Lists page in the Contacts app, then long press the list you just created.
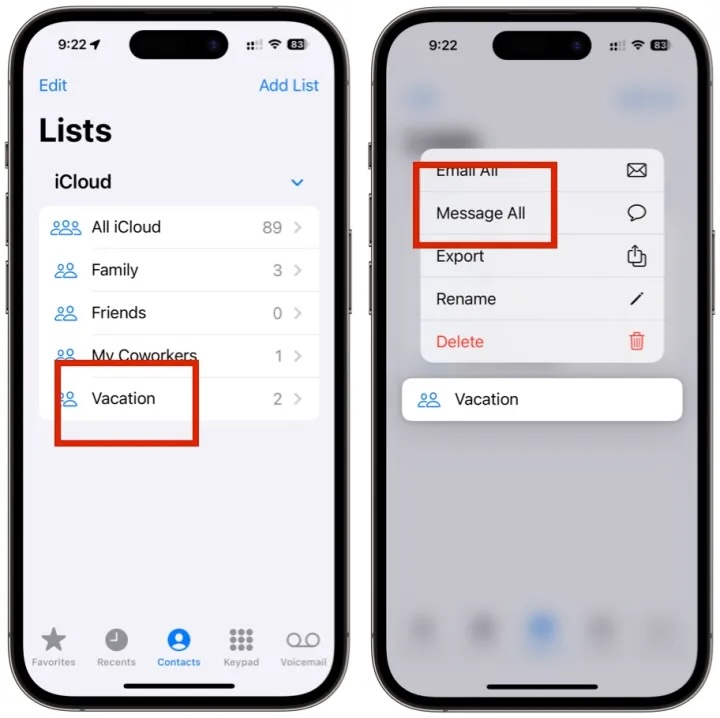
Image used with permission by copyright holder
Step 2: Choose Message All. Send a message to the group as you would any other message.
How to remove a contact from your group
The time may come when you want to remove someone from your group. Should the need arise, doing so is quite simple:
Step 1: To get started, go into the Contacts app, then select the list you created above.
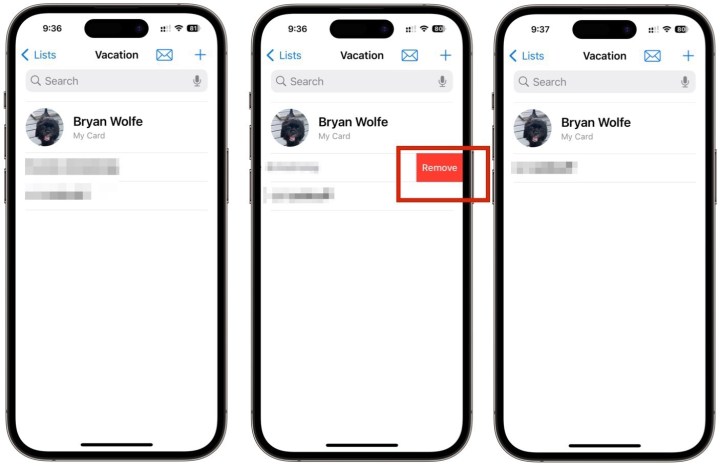
Image used with permission by copyright holder
Step 2: Swipe left on the contact you wish to remove and tap Remove. Your contact has been permanently removed from your group.
How to delete a contact group on your iPhone
Similarly, you can also delete the entire contact group if it’s no longer needed.
Step 1: To get started, go into the Contacts app, then choose the List page.
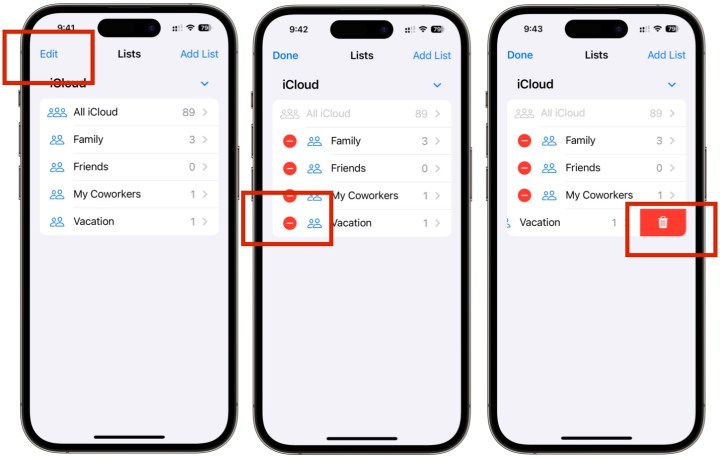
Image used with permission by copyright holder
Step 2: Tap Edit at the top left.
Step 3: Tap the red icon to the left of the list you wish to delete.
Step 4: Tap the red garbage icon to delete the list. Your list is now deleted.
There are a lot of unique things you can do with the Messages app on your iPhone and iPad. In iOS 17, there’s even more, such as creating your own iMessage stickers. You can also edit and unsend messages, along with the option to filter unknown senders. Managing your contacts and messages can be a pain, but if you know how to take control of the settings at your disposal, it doesn’t have to be.
Editors’ Recommendations
iPhone has a bunch of cool features, but few are as useful as contact groups. As of iOS 16, Apple lets you pool contacts together into groups, making it easy to spam out messages to family, friends, or colleagues without needing to tinker with a bunch of clunky settings. You don’t even need any extra software or apps – as long as you’re running iOS 16 or later, you can quickly make a contact group on your iPhone.
In this guide, we’ll show you exactly how to create a contact group on your iPhone, how to send messages to that group, and how to remove contacts or delete groups from your phone.
How to create a contact group on your iPhone
When you create a new contact group, you can add as many contacts as you want. And the steps for doing so are as follows:
Step 1: On the iPhone home screen, tap on the Contacts app. You can also get there by tapping on the Phone app, then selecting Contacts at the bottom.
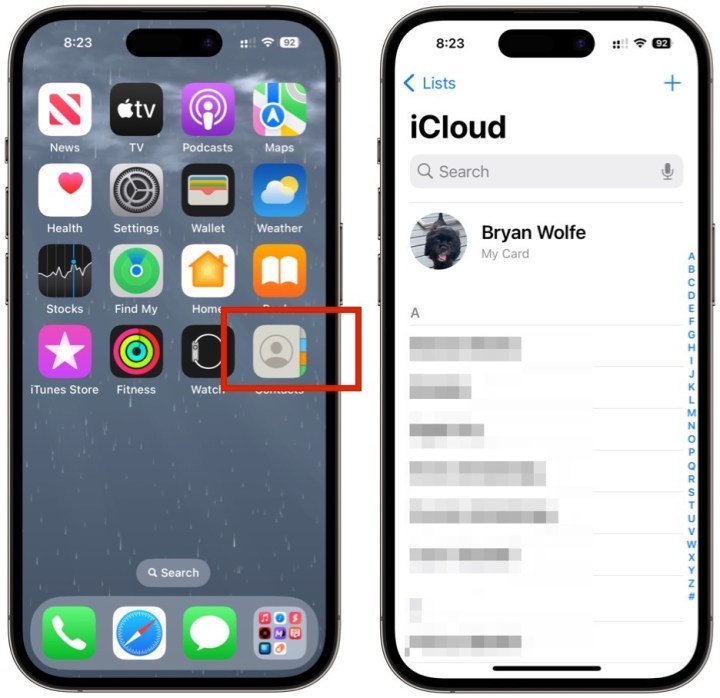
Image used with permission by copyright holder
Step 2: Tap Lists at the top left.
Image used with permission by copyright holder
Step 3: Next, tap Add List at the top right.
Image used with permission by copyright holder
Step 4: In the newly formed box, type the List Name. Tap Add List at the top right.
Image used with permission by copyright holder
Step 5: On the Lists page, choose the list you just created. Tap Add Contacts. Choose every contact you wish to add to the list. When finished, tap Done at the top right.
How to send a message to your contact group
With your contact group created, you’re now ready to send messages to your group. Here’s how it works:
Step 1: Go back into the Lists page in the Contacts app, then long press the list you just created.
Image used with permission by copyright holder
Step 2: Choose Message All. Send a message to the group as you would any other message.
How to remove a contact from your group
The time may come when you want to remove someone from your group. Should the need arise, doing so is quite simple:
Step 1: To get started, go into the Contacts app, then select the list you created above.
Image used with permission by copyright holder
Step 2: Swipe left on the contact you wish to remove and tap Remove. Your contact has been permanently removed from your group.
How to delete a contact group on your iPhone
Similarly, you can also delete the entire contact group if it’s no longer needed.
Step 1: To get started, go into the Contacts app, then choose the List page.
Image used with permission by copyright holder
Step 2: Tap Edit at the top left.
Step 3: Tap the red icon to the left of the list you wish to delete.
Step 4: Tap the red garbage icon to delete the list. Your list is now deleted.
There are a lot of unique things you can do with the Messages app on your iPhone and iPad. In iOS 17, there’s even more, such as creating your own iMessage stickers. You can also edit and unsend messages, along with the option to filter unknown senders. Managing your contacts and messages can be a pain, but if you know how to take control of the settings at your disposal, it doesn’t have to be.
Editors’ Recommendations
Denial of responsibility! Techno Blender is an automatic aggregator of the all world’s media. In each content, the hyperlink to the primary source is specified. All trademarks belong to their rightful owners, all materials to their authors. If you are the owner of the content and do not want us to publish your materials, please contact us by email – [email protected]. The content will be deleted within 24 hours.