
The most common motherboard problems, and how to fix them
Your computer’s motherboard is a critical component that plays a major part in what other components you can and can’t install. Having their digital fingers in so many pies, though, makes troubleshooting motherboards quite difficult. Is it the motherboard, or the components? Just as a faulty CPU can stop your PC from booting, a motherboard problem can cause the same issue. A crashing GPU could also be because of a motherboard issue.
Fortunately, some of the most common motherboard problems are relatively easy to fix. Here’s how to do it.
Reset your UEFI/BIOS
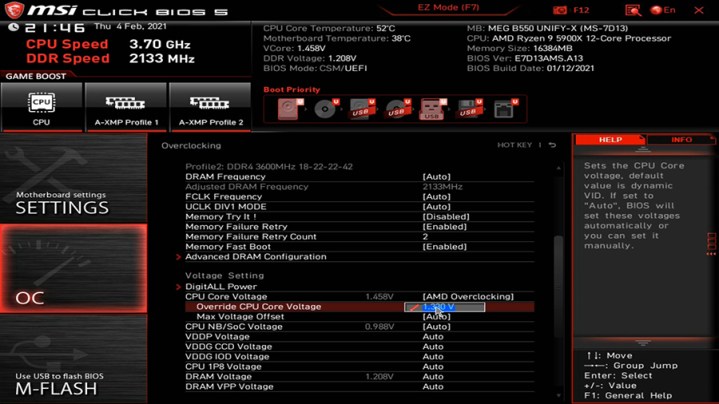
It’s not uncommon for BIOS settings, particularly overclocks and standards changes, to cause problems with your PC. If you push things too far, turn on a setting your hardware isn’t compatible with, or disable something important, you could find your system is unstable, won’t get past the power-on self-test (POST) screen, or won’t turn on at all.
The easiest and quickest fix for this, and heaps of other motherboard problems, is to reset the BIOS.
Some motherboards have BIOS reset buttons on the rear I/O panel, or on the motherboard itself. If you can get into the BIOS (here’s how to access your BIOS) then you can use the reset command — typically F5 — to reset the BIOS to its factory default setting.
If you can’t do any of the above, though, you can always do it the old-school, manual way. Power down the PC and take off the side panel. Unplug the power cable and locate the small, circular disc battery on the motherboard. Carefully remove it, then press and hold the power button on your PC for 30 seconds. This should drain any residual power from the motherboard, leaving its settings to reset to default without their battery backup.
Now you can reinstall the battery, plug the cables back in, and power up the system to see if it’s fixed your motherboard problem.

Have you checked the power?
If your system won’t turn on at all, then checking the power cables is an absolute must. Modern motherboards typically require multiple power cables, and forgetting just one of them will mean your PC won’t turn on at all. There’s a main 20- to 24-pin connector and a second four- or eight-pin connector hidden away by the processor socket. Some PCs even have a secondary four- or eight-pin cable, too.
Check that you have all the required cables plugged in, and that they are fully seated and properly matched with the correct power supply cords. If in doubt, unplug them and plug them in again.
Are the components installed correctly?
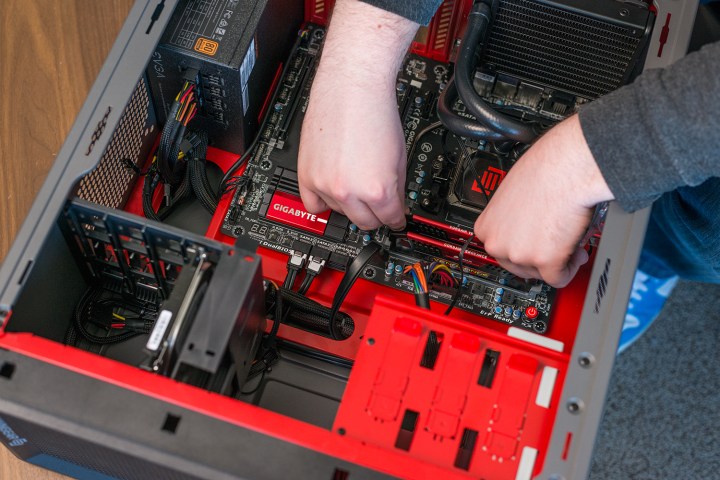
Components can cause a motherboard to malfunction if they’re not properly installed, leading to an unstable system at best, and one that won’t even boot at worst. RAM, graphics cards, the CPU itself, and any add-in cards you have can all cause these issues if not installed properly, so it’s a good idea to check them if you think you might have a hardware problem.
Examine your graphics card if you can, but it’s typically easier to just reseat it. Remove the power cables, then remove its PCI-bracket screw, press down on the retention bracket near the end of the PCIExpress slot, and then remove the card. Push it back into the slot carefully to reseat it and make sure you hear the click of the bracket engaging before screwing it in again.
The RAM slot has two plastic wings that should snap over the sides of each stick of memory. These should be standing upright at 90 degrees from the motherboard’s surface and securely inserted around the tabs found on each side of your RAM sticks. If one or both wings are slightly askew, the RAM isn’t properly installed.
Properly installing a processor is much more difficult, but is worth checking if you’re really stumped. The pins and the slot on the processor and motherboard must be properly lined up. Once inserted, the processor should sit flat on the socket’s surface. The processor’s heat sink should also attach firmly.
For more help on installing or reinstalling a processor, check out our guides on how to install an Intel CPU and how to install an AMD CPU.

Is something shorting out?
Motherboards are filled with capacitors and soldered connections that route data and power from one part of the board to another. As you may have noticed, the motherboard is held aloft from the PC case by a series of screw-in standoffs that are about a quarter-inch thick. These exist because the motherboard can short if it makes contact with other metallic components, which can cause the system to crash, or even do damage to its components.
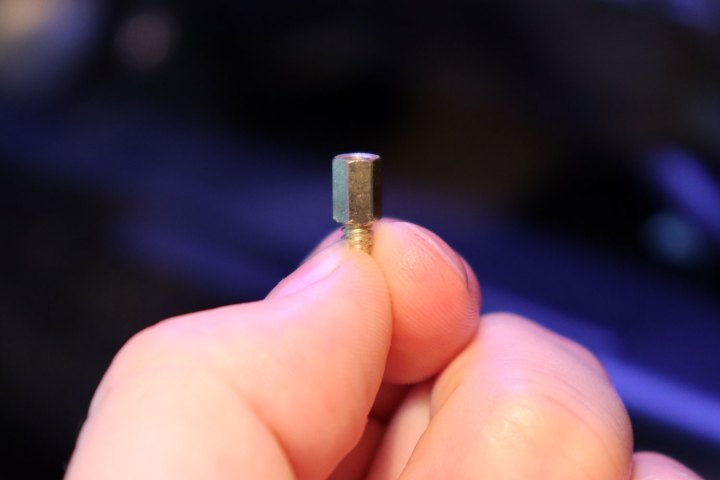
A motherboard experiencing a short may start up and immediately shut down again, or may boot, but then crash at random. Examine how your motherboard is installed. Check that you used the standoffs that keep the motherboard from contacting the case and ensure that any unsupported portions of the motherboard haven’t bent toward the case’s interior. Also, check that all internal wires are properly shielded with a rubber or plastic exterior.
If you’re still unsure if something is shorting, remove the entire PC from the case and rebuild it on your desk with all the components separated so you can easily diagnose where the short is occurring.
Check the front panel connectors
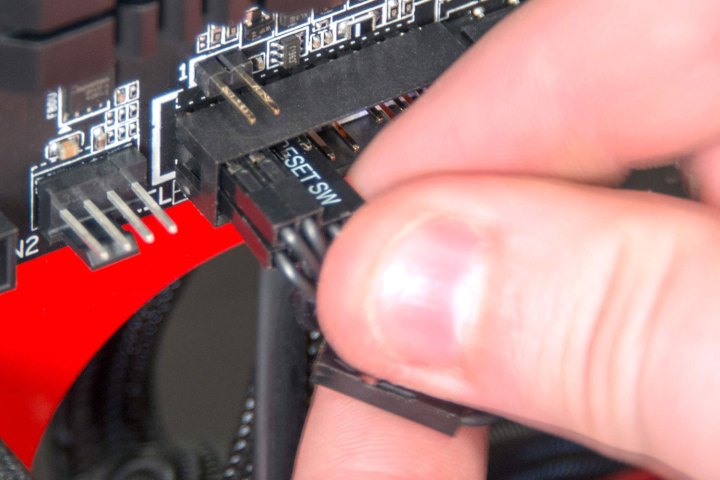
The power button on a computer’s case connects to the motherboard through a thin, two-pin wire, along with other front panel connectors like restart buttons, power LEDs, and hard drive activity lights. Without this important but easy-to-miss connection, your computer won’t start. That’s because the motherboard never receives the command to do so if you press the power button when the wire isn’t connected to the proper pins on your motherboard.
Follow the wires from the front panel to your motherboard and make sure that the power button connectors (sometimes labeled with a + and a -) are connected properly. If in doubt, remove all of them, and just make sure that the power button ones are in place before reattaching the others.
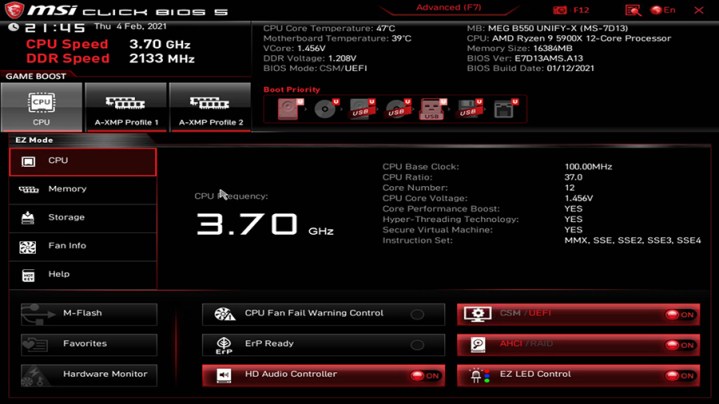
Try updating your UEFI/BIOS/Firmware
The Unified Extensible Firmware Interface (UEFI) and Basic Input/Output System (BIOS) connect your PC’s firmware to its operating system. If it’s not compatible with the CPU or some other component you’ve installed, it won’t turn on. The latest UEFI/BIOS updates typically improve stability and add features, but they can improve compatibility too, so if you’re experiencing a motherboard problem, then updating your motherboard’s firmware could be the answer.
First, uninstall any hardware that you installed that caused this issue so you can get the system back to a working state again. Alternatively, some companies, like AMD, do have chip loan programs that can help get you up and running again.
When you have a working system again, download the latest motherboard firmware from your manufacturer’s website. Copy the files over to a USB drive, then reboot your system. Look in your UEFI for a tool that can update the BIOS, often located in the Tools section, though this will differ by manufacturer.
Follow the on-screen instructions to update the firmware, and your problem should be solved. For more tips, follow our guide on how to update your BIOS.
Note: Do not reboot, power down, or otherwise interfere with the firmware update process, as doing so can make your PC inoperable permanently.
Replace your motherboard
If none of the above has helped you solve your issue and you’re still certain the motherboard is at fault, it may be time to replace it. If you want some help choosing, we have a guide to the best motherboards you can buy.
Editors’ Recommendations
Your computer’s motherboard is a critical component that plays a major part in what other components you can and can’t install. Having their digital fingers in so many pies, though, makes troubleshooting motherboards quite difficult. Is it the motherboard, or the components? Just as a faulty CPU can stop your PC from booting, a motherboard problem can cause the same issue. A crashing GPU could also be because of a motherboard issue.
Fortunately, some of the most common motherboard problems are relatively easy to fix. Here’s how to do it.
Reset your UEFI/BIOS
It’s not uncommon for BIOS settings, particularly overclocks and standards changes, to cause problems with your PC. If you push things too far, turn on a setting your hardware isn’t compatible with, or disable something important, you could find your system is unstable, won’t get past the power-on self-test (POST) screen, or won’t turn on at all.
The easiest and quickest fix for this, and heaps of other motherboard problems, is to reset the BIOS.
Some motherboards have BIOS reset buttons on the rear I/O panel, or on the motherboard itself. If you can get into the BIOS (here’s how to access your BIOS) then you can use the reset command — typically F5 — to reset the BIOS to its factory default setting.
If you can’t do any of the above, though, you can always do it the old-school, manual way. Power down the PC and take off the side panel. Unplug the power cable and locate the small, circular disc battery on the motherboard. Carefully remove it, then press and hold the power button on your PC for 30 seconds. This should drain any residual power from the motherboard, leaving its settings to reset to default without their battery backup.
Now you can reinstall the battery, plug the cables back in, and power up the system to see if it’s fixed your motherboard problem.
Have you checked the power?
If your system won’t turn on at all, then checking the power cables is an absolute must. Modern motherboards typically require multiple power cables, and forgetting just one of them will mean your PC won’t turn on at all. There’s a main 20- to 24-pin connector and a second four- or eight-pin connector hidden away by the processor socket. Some PCs even have a secondary four- or eight-pin cable, too.
Check that you have all the required cables plugged in, and that they are fully seated and properly matched with the correct power supply cords. If in doubt, unplug them and plug them in again.
Are the components installed correctly?
Components can cause a motherboard to malfunction if they’re not properly installed, leading to an unstable system at best, and one that won’t even boot at worst. RAM, graphics cards, the CPU itself, and any add-in cards you have can all cause these issues if not installed properly, so it’s a good idea to check them if you think you might have a hardware problem.
Examine your graphics card if you can, but it’s typically easier to just reseat it. Remove the power cables, then remove its PCI-bracket screw, press down on the retention bracket near the end of the PCIExpress slot, and then remove the card. Push it back into the slot carefully to reseat it and make sure you hear the click of the bracket engaging before screwing it in again.
The RAM slot has two plastic wings that should snap over the sides of each stick of memory. These should be standing upright at 90 degrees from the motherboard’s surface and securely inserted around the tabs found on each side of your RAM sticks. If one or both wings are slightly askew, the RAM isn’t properly installed.
Properly installing a processor is much more difficult, but is worth checking if you’re really stumped. The pins and the slot on the processor and motherboard must be properly lined up. Once inserted, the processor should sit flat on the socket’s surface. The processor’s heat sink should also attach firmly.
For more help on installing or reinstalling a processor, check out our guides on how to install an Intel CPU and how to install an AMD CPU.
Is something shorting out?
Motherboards are filled with capacitors and soldered connections that route data and power from one part of the board to another. As you may have noticed, the motherboard is held aloft from the PC case by a series of screw-in standoffs that are about a quarter-inch thick. These exist because the motherboard can short if it makes contact with other metallic components, which can cause the system to crash, or even do damage to its components.
A motherboard experiencing a short may start up and immediately shut down again, or may boot, but then crash at random. Examine how your motherboard is installed. Check that you used the standoffs that keep the motherboard from contacting the case and ensure that any unsupported portions of the motherboard haven’t bent toward the case’s interior. Also, check that all internal wires are properly shielded with a rubber or plastic exterior.
If you’re still unsure if something is shorting, remove the entire PC from the case and rebuild it on your desk with all the components separated so you can easily diagnose where the short is occurring.
Check the front panel connectors
The power button on a computer’s case connects to the motherboard through a thin, two-pin wire, along with other front panel connectors like restart buttons, power LEDs, and hard drive activity lights. Without this important but easy-to-miss connection, your computer won’t start. That’s because the motherboard never receives the command to do so if you press the power button when the wire isn’t connected to the proper pins on your motherboard.
Follow the wires from the front panel to your motherboard and make sure that the power button connectors (sometimes labeled with a + and a -) are connected properly. If in doubt, remove all of them, and just make sure that the power button ones are in place before reattaching the others.
Try updating your UEFI/BIOS/Firmware
The Unified Extensible Firmware Interface (UEFI) and Basic Input/Output System (BIOS) connect your PC’s firmware to its operating system. If it’s not compatible with the CPU or some other component you’ve installed, it won’t turn on. The latest UEFI/BIOS updates typically improve stability and add features, but they can improve compatibility too, so if you’re experiencing a motherboard problem, then updating your motherboard’s firmware could be the answer.
First, uninstall any hardware that you installed that caused this issue so you can get the system back to a working state again. Alternatively, some companies, like AMD, do have chip loan programs that can help get you up and running again.
When you have a working system again, download the latest motherboard firmware from your manufacturer’s website. Copy the files over to a USB drive, then reboot your system. Look in your UEFI for a tool that can update the BIOS, often located in the Tools section, though this will differ by manufacturer.
Follow the on-screen instructions to update the firmware, and your problem should be solved. For more tips, follow our guide on how to update your BIOS.
Note: Do not reboot, power down, or otherwise interfere with the firmware update process, as doing so can make your PC inoperable permanently.
Replace your motherboard
If none of the above has helped you solve your issue and you’re still certain the motherboard is at fault, it may be time to replace it. If you want some help choosing, we have a guide to the best motherboards you can buy.
Editors’ Recommendations
Denial of responsibility! Techno Blender is an automatic aggregator of the all world’s media. In each content, the hyperlink to the primary source is specified. All trademarks belong to their rightful owners, all materials to their authors. If you are the owner of the content and do not want us to publish your materials, please contact us by email – [email protected]. The content will be deleted within 24 hours.