
Deploying An Image Captioning Server With BentoML
Much has changed since I wrote the article An Introduction to BentoML: A Unified AI Application Framework, both in the general AI landscape and BentoML. Generative AI, Large Language Models, diffusion models, ChatGPT (Sora), and Gemma: these are probably the most mentioned terms over the past several months in AI and the pace of change is overwhelming. Amid these brilliant AI breakthroughs, the quest for AI deployment tools that are not only powerful but also user-friendly and cost-effective remains unchanged. For BentoML, it comes with a major update 1.2, which moves towards the very same goal.
In this blog post, let’s revisit BentoML and use a simple example to see how we can leverage some of the new tools and functionalities provided by BentoML to build an AI application in production.
The example application I will build is capable of doing image captioning, which involves generating a textual description for an image using AI. BLIP (Bootstrapping Language-Image Pre-training) is a method that improves these AI models by initially training on large image-text datasets to understand their relationship, and then further refining this understanding with specific tasks like captioning. The BLIP model I will use in the sections below is Salesforce/blip-image-captioning-large. You can use any other BLIP model for this example as the code implementation logic is the same.
A Quick Intro
Before we delve deeper, let’s highlight what BentoML brings to the table, especially with its 1.2 update. At its core, BentoML is an open-source platform designed to streamline the serving and deployment of AI applications. Here’s a simplified workflow with BentoML 1.2:
- Model wrapping: Use BentoML Service SDKs to wrap your machine learning model so that you can expose it as an inference endpoint.
- Model serving: Run the model on your own machine, leveraging your own resources (like GPUs) for model inference through the endpoint.
- Easy deployment: Deploy your model to a serverless platform BentoCloud.
For the last step, previously we needed to manually build a Bento (the unified distribution unit in BentoML which contains source code, Python packages, and model reference and configuration), then push and deploy it to BentoCloud. With BentoML 1.2, “Build, Push, and Deploy” are now consolidated into a single command bentoml deploy. I will talk more about the details and BentoCloud in the example below.
Note: If you want to deploy the model in your own infrastructure, you can still do that by manually building a Bento, and then containerizing it as an OCI-compliant image.
Now, let’s get started to see how this works in practice!
Setting up the Environment
Create a virtual environment using venv. This is recommended as it helps avoid potential package conflicts.
python -m venv bentoml-new
source bentoml-new/bin/activate
Install all the dependencies.
pip install "bentoml>=1.2.2" pillow torch transformers
Building A BentoML Service
First, import the necessary packages and use a constant to store the model ID.
from __future__ import annotations

import typing as t

import bentoml
from PIL.Image import Image

MODEL_ID = "Salesforce/blip-image-captioning-large"
Next, let’s create a BentoML Service. For versions prior to BentoML 1.2, we use abstractions called “Runners” for model inference. In 1.2, BentoML works off this Runner concept by integrating the functionalities of API Servers and Runners into a single entity called “Services.” They are the key building blocks for defining model-serving logic in BentoML.
Starting from 1.2, we use the @bentoml.service decorator to mark a Python class as a BentoML Service in a file called service.py. For this BLIP example, we can create a Service called BlipImageCaptioning like this:
@bentoml.service
class BlipImageCaptioning:
During initialization, what we usually do is load the model (and other components if necessary) and move it to GPU for better computation efficiency. If you are not sure what function or package to use, just copy and paste the initialization code from the BLIP model’s Hugging Face repo. Here is an example:
@bentoml.service
class BlipImageCaptioning:

    def __init__(self) -> None:
        import torch
        from transformers import BlipProcessor, BlipForConditionalGeneration
        # Load the model with torch and set it to use either GPU or CPU
        self.device = "cuda" if torch.cuda.is_available() else "cpu"
        self.model = BlipForConditionalGeneration.from_pretrained(MODEL_ID).to(self.device)
        self.processor = BlipProcessor.from_pretrained(MODEL_ID)
        print("Model blip loaded", "device:", self.device)
The next step is to create an endpoint function for user interaction through @bentoml.api. When applied to a Python function, it transforms that function into an API endpoint that can handle web requests.
This BLIP model can take an image and optionally some starting text for captioning, so I defined it this way:
@bentoml.service
class BlipImageCaptioning:

    ...

    @bentoml.api
    async def generate(self, img: Image, txt: t.Optional[str] = None) -> str:
        if txt:
            inputs = self.processor(img, txt, return_tensors="pt").to(self.device)
        else:
            inputs = self.processor(img, return_tensors="pt").to(self.device)
        # Generate a caption for the given image by processing the inputs through the model, setting a limit on the maximum and minimum number of new tokens (words) that can be added to the caption.
        out = self.model.generate(**inputs, max_new_tokens=100, min_new_tokens=20)
        # Decode the generated output into a readable caption, skipping any special tokens that are not meant for display
        return self.processor.decode(out[0], skip_special_tokens=True)
The generate method within the class is an asynchronous function exposed as an API endpoint. It receives an image and an optional txt parameter, processes them with the BLIP model, and returns a generated caption. Note that the main inference code also comes from the BLIP model’s Hugging Face repo. BentoML here only helps you manage the input and output logic.
That’s all the code! The complete version:
from __future__ import annotations

import typing as t

import bentoml
from PIL.Image import Image

MODEL_ID = "Salesforce/blip-image-captioning-large"

@bentoml.service
class BlipImageCaptioning:

    def __init__(self) -> None:
        import torch
        from transformers import BlipProcessor, BlipForConditionalGeneration
        self.device = "cuda" if torch.cuda.is_available() else "cpu"
        self.model = BlipForConditionalGeneration.from_pretrained(MODEL_ID).to(self.device)
        self.processor = BlipProcessor.from_pretrained(MODEL_ID)
        print("Model blip loaded", "device:", self.device)

    @bentoml.api
    async def generate(self, img: Image, txt: t.Optional[str] = None) -> str:
        if txt:
            inputs = self.processor(img, txt, return_tensors="pt").to(self.device)
        else:
            inputs = self.processor(img, return_tensors="pt").to(self.device)

        out = self.model.generate(**inputs, max_new_tokens=100, min_new_tokens=20)
        return self.processor.decode(out[0], skip_special_tokens=True)
To serve this model locally, run:
bentoml serve service:BlipImageCaptioning
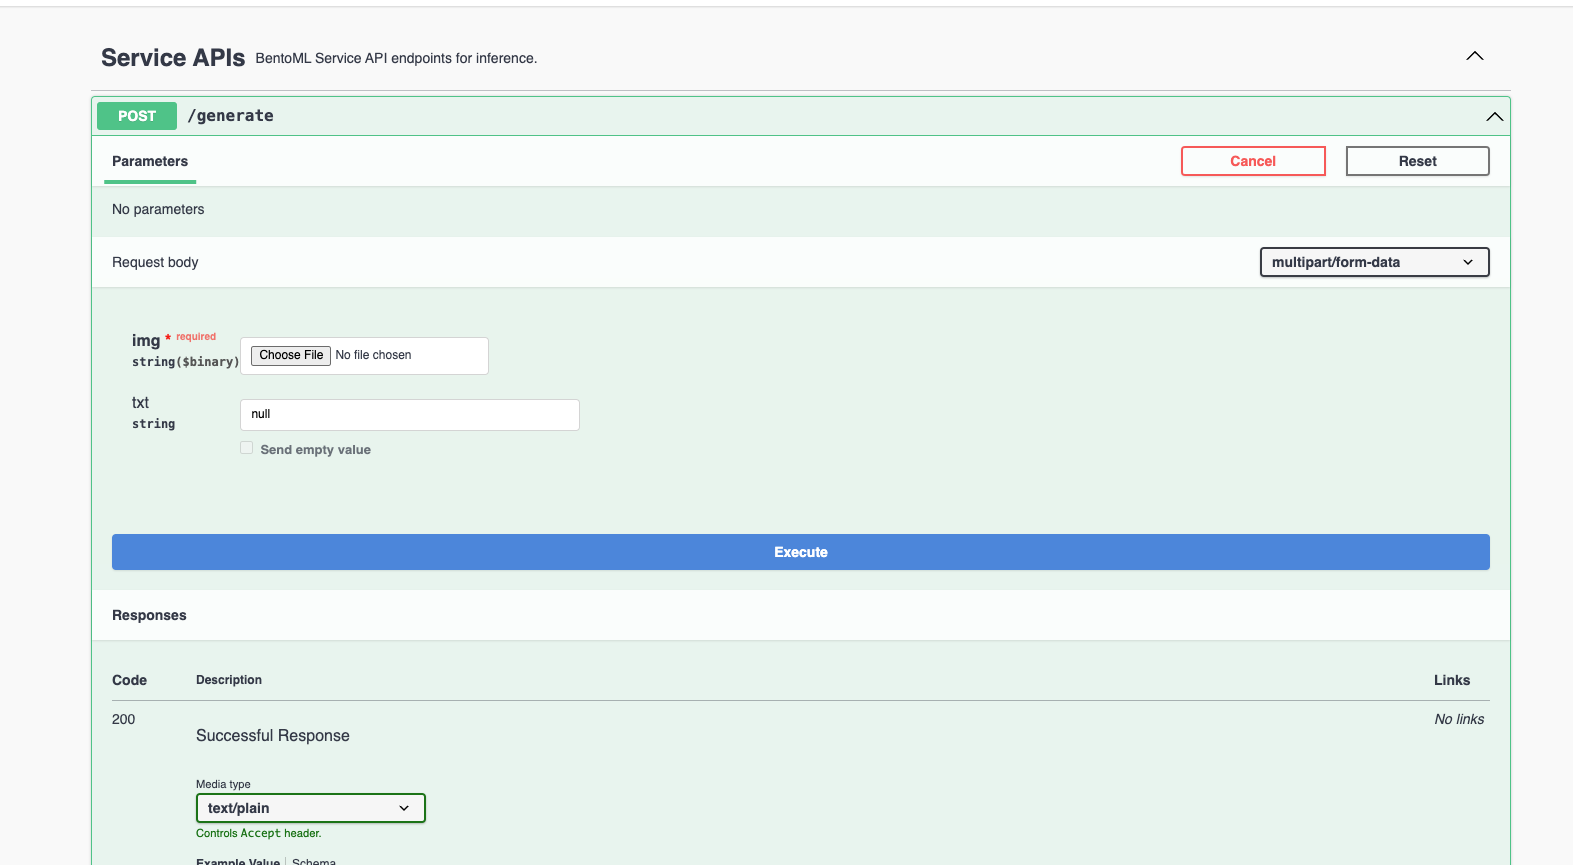
The HTTP server is accessible at http://localhost:3000. You can interact with it using the Swagger UI.
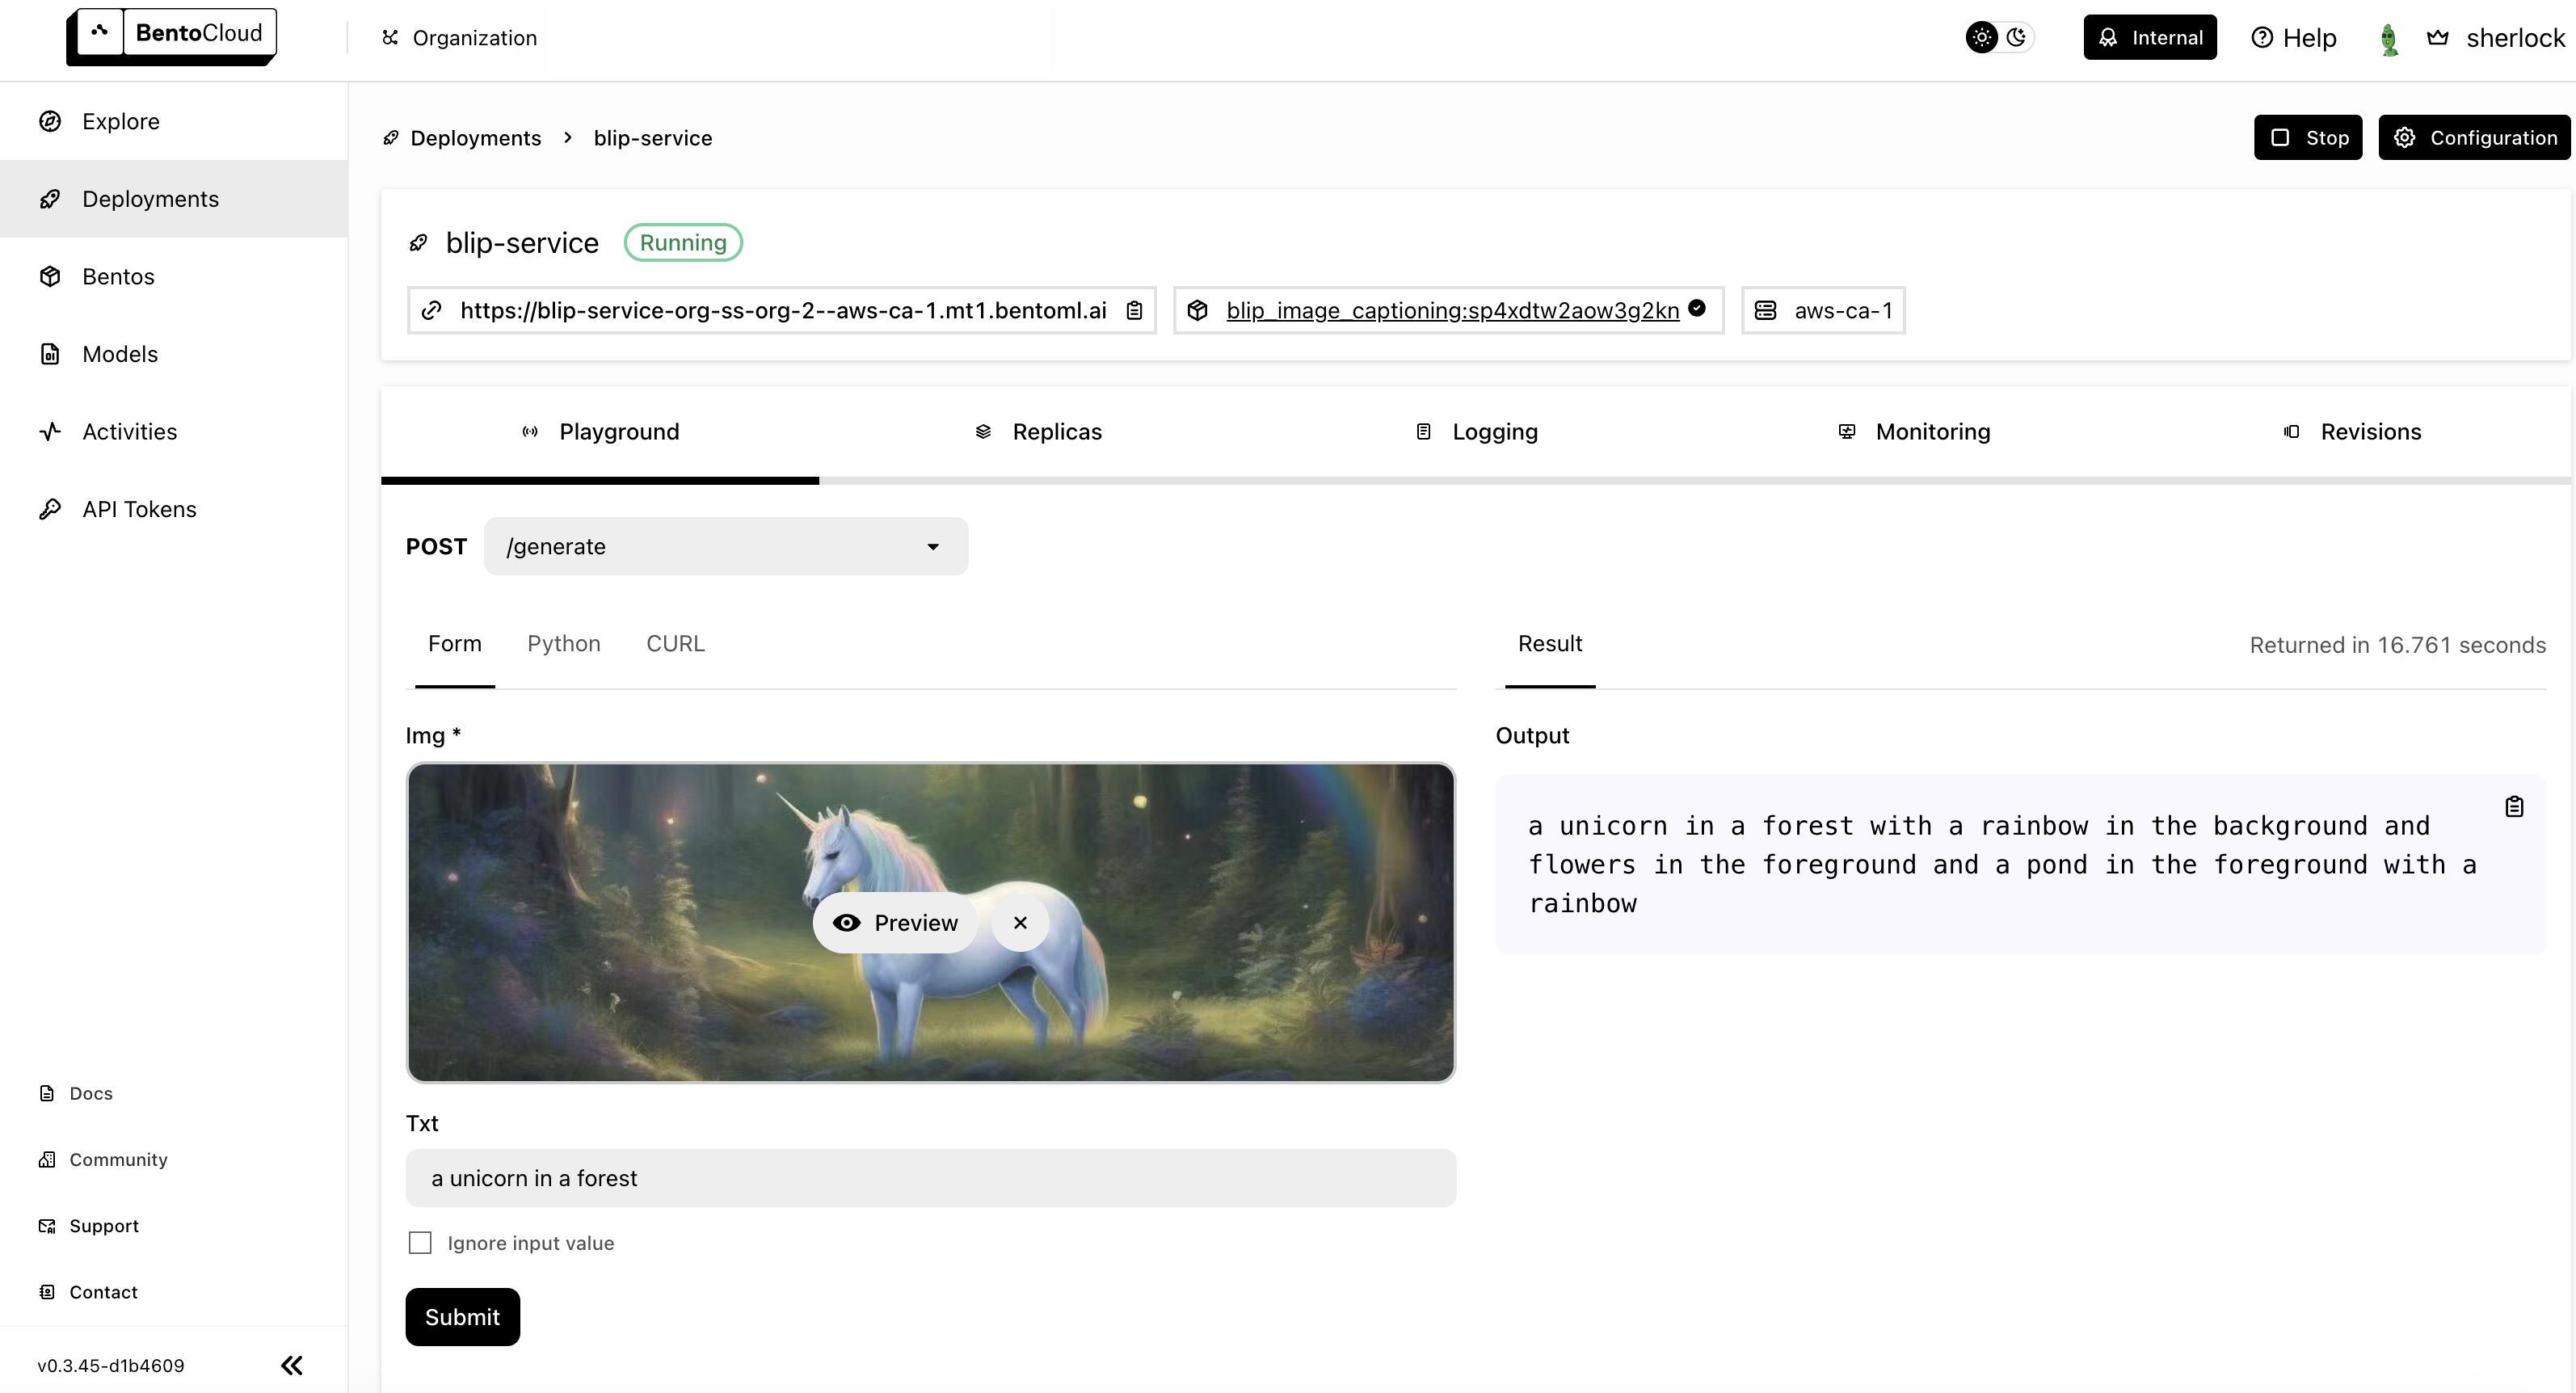
I uploaded the image below (I created this image with Stable Diffusion, and it was also deployed using BentoML) and used the prompt text “a unicorn in a forest” for inference.

The image caption output by the model was : a unicorn in a forest with a rainbow in the background and flowers in the foreground and a pond in the foreground with a rainbow.
Local serving works properly but there are different things we always need to consider for deploying AI applications in production, such as infrastructure (especially GPUs), scaling, observability, and cost-efficiency. This is where BentoCloud comes in.
Deploying to BentoCloud
Explaining BentoCloud may require an independent blog post. Here’s an overview of what it offers and how you can leverage it for your machine learning deployment:
- Autoscaling for ML workloads: BentoCloud dynamically scales deployment replicas based on incoming traffic, scaling down to zero during periods of inactivity to optimize costs.
- Built-in observability: Access real-time insights into your traffic, monitor resource utilization, track operational events, and review audit logs directly through the BentoCloud console.
- Optimized infrastructure. With BentoCloud, the focus shifts entirely to code development as the platform manages all underlying infrastructure, ensuring an optimized environment for your AI applications.
To prepare your BentoML Service for BentoCloud deployment, begin by specifying the resources field in your Service code. This tells BentoCloud how to allocate the proper instance type for your Service. For details, see Configurations.
@bentoml.service(
    resources={
        "memory" : "4Gi"
    }
)
class BlipImageCaptioning:
Next, create a bentofile.yaml file to define the build options, which is used for building a Bento. Again, when using BentoCloud, you don’t need to build a Bento manually, since BentoML does this automatically for you.
service: "service:BlipImageCaptioning"
labels:
  owner: bentoml-team
  project: gallery
include:
- "*.py"
python:
    packages:
    - torch
    - transformers
    - pillow
Deploy your Service to BentoCloud using the bentoml deploy command, and use the -n flag to assign a custom name to your Deployment. Don’t forget to log in beforehand.
bentoml deploy . -n blip-service
Deployment involves a series of automated processes where BentoML builds a Bento, and then pushes and deploys it to BentoCloud. You can see the status displayed in your terminal.

All set! Once deployed, you can find the Deployment on the BentoCloud console, which provides a comprehensive interface, offering enhanced user experience for interacting with your Service.
Conclusion
BentoML 1.2 significantly simplifies AI deployment, enabling developers to easily bring AI models into production. Its integration with BentoCloud offers scalable, efficient solutions. In future blog posts, I will demonstrate how to build more production-ready AI applications for different scenarios. Happy coding!
Much has changed since I wrote the article An Introduction to BentoML: A Unified AI Application Framework, both in the general AI landscape and BentoML. Generative AI, Large Language Models, diffusion models, ChatGPT (Sora), and Gemma: these are probably the most mentioned terms over the past several months in AI and the pace of change is overwhelming. Amid these brilliant AI breakthroughs, the quest for AI deployment tools that are not only powerful but also user-friendly and cost-effective remains unchanged. For BentoML, it comes with a major update 1.2, which moves towards the very same goal.
In this blog post, let’s revisit BentoML and use a simple example to see how we can leverage some of the new tools and functionalities provided by BentoML to build an AI application in production.
The example application I will build is capable of doing image captioning, which involves generating a textual description for an image using AI. BLIP (Bootstrapping Language-Image Pre-training) is a method that improves these AI models by initially training on large image-text datasets to understand their relationship, and then further refining this understanding with specific tasks like captioning. The BLIP model I will use in the sections below is Salesforce/blip-image-captioning-large. You can use any other BLIP model for this example as the code implementation logic is the same.
A Quick Intro
Before we delve deeper, let’s highlight what BentoML brings to the table, especially with its 1.2 update. At its core, BentoML is an open-source platform designed to streamline the serving and deployment of AI applications. Here’s a simplified workflow with BentoML 1.2:
- Model wrapping: Use BentoML Service SDKs to wrap your machine learning model so that you can expose it as an inference endpoint.
- Model serving: Run the model on your own machine, leveraging your own resources (like GPUs) for model inference through the endpoint.
- Easy deployment: Deploy your model to a serverless platform BentoCloud.
For the last step, previously we needed to manually build a Bento (the unified distribution unit in BentoML which contains source code, Python packages, and model reference and configuration), then push and deploy it to BentoCloud. With BentoML 1.2, “Build, Push, and Deploy” are now consolidated into a single command bentoml deploy. I will talk more about the details and BentoCloud in the example below.
Note: If you want to deploy the model in your own infrastructure, you can still do that by manually building a Bento, and then containerizing it as an OCI-compliant image.
Now, let’s get started to see how this works in practice!
Setting up the Environment
Create a virtual environment using venv. This is recommended as it helps avoid potential package conflicts.
python -m venv bentoml-new
source bentoml-new/bin/activate
Install all the dependencies.
pip install "bentoml>=1.2.2" pillow torch transformers
Building A BentoML Service
First, import the necessary packages and use a constant to store the model ID.
from __future__ import annotations

import typing as t

import bentoml
from PIL.Image import Image

MODEL_ID = "Salesforce/blip-image-captioning-large"
Next, let’s create a BentoML Service. For versions prior to BentoML 1.2, we use abstractions called “Runners” for model inference. In 1.2, BentoML works off this Runner concept by integrating the functionalities of API Servers and Runners into a single entity called “Services.” They are the key building blocks for defining model-serving logic in BentoML.
Starting from 1.2, we use the @bentoml.service decorator to mark a Python class as a BentoML Service in a file called service.py. For this BLIP example, we can create a Service called BlipImageCaptioning like this:
@bentoml.service
class BlipImageCaptioning:
During initialization, what we usually do is load the model (and other components if necessary) and move it to GPU for better computation efficiency. If you are not sure what function or package to use, just copy and paste the initialization code from the BLIP model’s Hugging Face repo. Here is an example:
@bentoml.service
class BlipImageCaptioning:

    def __init__(self) -> None:
        import torch
        from transformers import BlipProcessor, BlipForConditionalGeneration
        # Load the model with torch and set it to use either GPU or CPU
        self.device = "cuda" if torch.cuda.is_available() else "cpu"
        self.model = BlipForConditionalGeneration.from_pretrained(MODEL_ID).to(self.device)
        self.processor = BlipProcessor.from_pretrained(MODEL_ID)
        print("Model blip loaded", "device:", self.device)
The next step is to create an endpoint function for user interaction through @bentoml.api. When applied to a Python function, it transforms that function into an API endpoint that can handle web requests.
This BLIP model can take an image and optionally some starting text for captioning, so I defined it this way:
@bentoml.service
class BlipImageCaptioning:

    ...

    @bentoml.api
    async def generate(self, img: Image, txt: t.Optional[str] = None) -> str:
        if txt:
            inputs = self.processor(img, txt, return_tensors="pt").to(self.device)
        else:
            inputs = self.processor(img, return_tensors="pt").to(self.device)
        # Generate a caption for the given image by processing the inputs through the model, setting a limit on the maximum and minimum number of new tokens (words) that can be added to the caption.
        out = self.model.generate(**inputs, max_new_tokens=100, min_new_tokens=20)
        # Decode the generated output into a readable caption, skipping any special tokens that are not meant for display
        return self.processor.decode(out[0], skip_special_tokens=True)
The generate method within the class is an asynchronous function exposed as an API endpoint. It receives an image and an optional txt parameter, processes them with the BLIP model, and returns a generated caption. Note that the main inference code also comes from the BLIP model’s Hugging Face repo. BentoML here only helps you manage the input and output logic.
That’s all the code! The complete version:
from __future__ import annotations

import typing as t

import bentoml
from PIL.Image import Image

MODEL_ID = "Salesforce/blip-image-captioning-large"

@bentoml.service
class BlipImageCaptioning:

    def __init__(self) -> None:
        import torch
        from transformers import BlipProcessor, BlipForConditionalGeneration
        self.device = "cuda" if torch.cuda.is_available() else "cpu"
        self.model = BlipForConditionalGeneration.from_pretrained(MODEL_ID).to(self.device)
        self.processor = BlipProcessor.from_pretrained(MODEL_ID)
        print("Model blip loaded", "device:", self.device)

    @bentoml.api
    async def generate(self, img: Image, txt: t.Optional[str] = None) -> str:
        if txt:
            inputs = self.processor(img, txt, return_tensors="pt").to(self.device)
        else:
            inputs = self.processor(img, return_tensors="pt").to(self.device)

        out = self.model.generate(**inputs, max_new_tokens=100, min_new_tokens=20)
        return self.processor.decode(out[0], skip_special_tokens=True)
To serve this model locally, run:
bentoml serve service:BlipImageCaptioning
The HTTP server is accessible at http://localhost:3000. You can interact with it using the Swagger UI.
I uploaded the image below (I created this image with Stable Diffusion, and it was also deployed using BentoML) and used the prompt text “a unicorn in a forest” for inference.
The image caption output by the model was : a unicorn in a forest with a rainbow in the background and flowers in the foreground and a pond in the foreground with a rainbow.
Local serving works properly but there are different things we always need to consider for deploying AI applications in production, such as infrastructure (especially GPUs), scaling, observability, and cost-efficiency. This is where BentoCloud comes in.
Deploying to BentoCloud
Explaining BentoCloud may require an independent blog post. Here’s an overview of what it offers and how you can leverage it for your machine learning deployment:
- Autoscaling for ML workloads: BentoCloud dynamically scales deployment replicas based on incoming traffic, scaling down to zero during periods of inactivity to optimize costs.
- Built-in observability: Access real-time insights into your traffic, monitor resource utilization, track operational events, and review audit logs directly through the BentoCloud console.
- Optimized infrastructure. With BentoCloud, the focus shifts entirely to code development as the platform manages all underlying infrastructure, ensuring an optimized environment for your AI applications.
To prepare your BentoML Service for BentoCloud deployment, begin by specifying the resources field in your Service code. This tells BentoCloud how to allocate the proper instance type for your Service. For details, see Configurations.
@bentoml.service(
    resources={
        "memory" : "4Gi"
    }
)
class BlipImageCaptioning:
Next, create a bentofile.yaml file to define the build options, which is used for building a Bento. Again, when using BentoCloud, you don’t need to build a Bento manually, since BentoML does this automatically for you.
service: "service:BlipImageCaptioning"
labels:
  owner: bentoml-team
  project: gallery
include:
- "*.py"
python:
    packages:
    - torch
    - transformers
    - pillow
Deploy your Service to BentoCloud using the bentoml deploy command, and use the -n flag to assign a custom name to your Deployment. Don’t forget to log in beforehand.
bentoml deploy . -n blip-service
Deployment involves a series of automated processes where BentoML builds a Bento, and then pushes and deploys it to BentoCloud. You can see the status displayed in your terminal.
All set! Once deployed, you can find the Deployment on the BentoCloud console, which provides a comprehensive interface, offering enhanced user experience for interacting with your Service.
Conclusion
BentoML 1.2 significantly simplifies AI deployment, enabling developers to easily bring AI models into production. Its integration with BentoCloud offers scalable, efficient solutions. In future blog posts, I will demonstrate how to build more production-ready AI applications for different scenarios. Happy coding!
Denial of responsibility! Techno Blender is an automatic aggregator of the all world’s media. In each content, the hyperlink to the primary source is specified. All trademarks belong to their rightful owners, all materials to their authors. If you are the owner of the content and do not want us to publish your materials, please contact us by email – [email protected]. The content will be deleted within 24 hours.