
Python Conda Environments for Both arm64 and x86_64 on M1 Apple Silicon | by Lloyd Hamilton | Sep, 2022
Seamlessly switch between arm64 and x86_64 Python dependencies on M1 Apple Silicon
The release of the M1 Apple Silicon in the new MacBook Pros can be considered one of the biggest generational leaps in chip technology. The new M1 chip, with the improved power and compute efficiency, is based on the arm64 architecture which is unlike previous generations’ Intel x86_64 chips.
While the change have caused many compatibility issues, the M1 chip boasts significantly higher single- and multi-thread performance over its Intel predecessors. This make the M1 MacBook Pro one of the best laptops money can buy for data science-related workloads.
Like many new technologies released by Apple, it often takes some time for the industry to catch up. While we wait for developers to release native support for many of the dependencies we rely on, Apple have released Rosetta to support software that is still based on x86_64 architecture. Nonetheless, for many Python developers like me, it is still common to encounter compatibility issues with our Python environments.
To that end, this blog details the configuration steps I have taken to set up my Python environments on M1 Apple Silicon. At the end of this blog, you will have learned how to configure Python to use arm64 or x86_64 based dependencies.
For the purpose of demonstration, we will be setting up our Python environment for tensorflow-macos as tensorflow-macos is only executable in arm64 Python environments. However, the process detailed here will allow you to install Python packages for both arm64 and x86_64 environments.
There are two specific dependencies that we will need to install first.
- Xcode
- miniforge3
1. Install Xcode:
To install Xcode, first open a terminal session by going to Applications > Utilities > Terminal. Then type in the command:
xcode-select-install
Do note Xcode installation may take a while to install.
2. Install miniforge3
Next, we will be installing Miniforge3. Miniforge3 is the community (conda-forge) driven minimalistic conda installer. Furthermore, Miniforge3 has native support for arm64 based architectures which is definitely advantageous.
To install Miniforge3, download the shell script from here:
Ensure that you select arm64 (Apple Silicon) architecture.
Once you have downloaded the shell script, you may need to enable execution of the shell script with:
chmod +x Miniforge3-MacOSX-arm64.sh
After which, execute the script with:
sh Miniforge3-MacOSX-arm64.sh
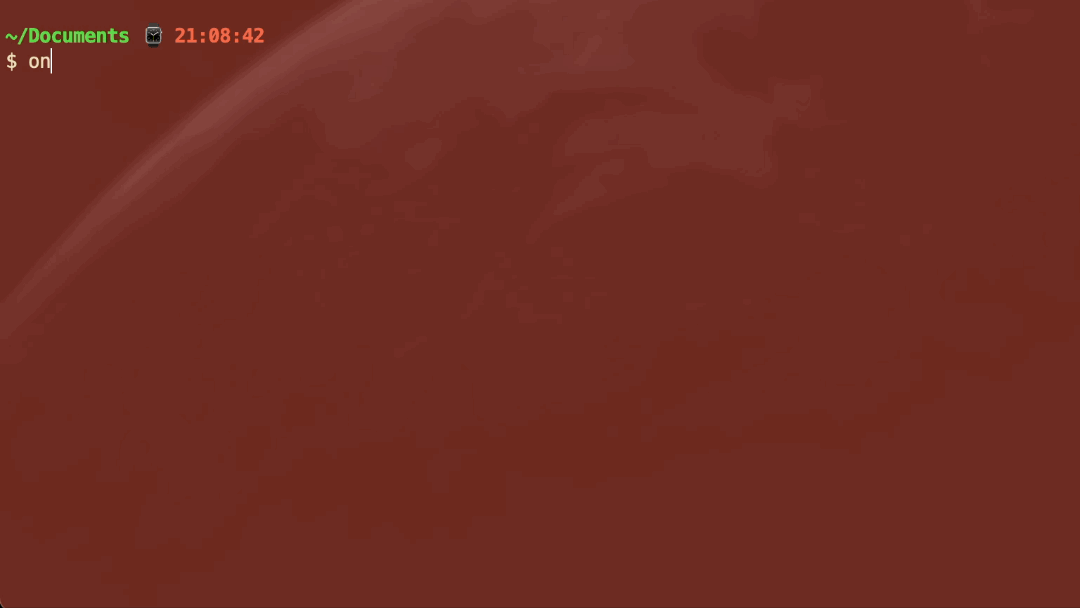
Work through the prompts and this will install conda on your machine. We can confirm if we have an installation of conda by using the command:
conda --version
You should get an output as shown below.

Once all dependencies have been installed, we can proceed with configuring conda for arm64 or x86_64 Python environments.
We will begin by adding some shortcuts to the current shell to facilitate the process of installing different conda environments. The snippet of code below will add two shortcut functions that will create either an osx-64 or osx-arm64 conda environment where we can install Python packages.
To do so, add the following code to ~/.zshrc or ~/.bashrc.
# Create x86 conda environment
create_x86_conda_environment () {# example usage: create_x86_conda_environment myenv_x86 python=3.9
CONDA_SUBDIR=osx-64 conda create -n $@
conda activate $1}# Create ARM conda environment
create_ARM_conda_environment () {# example usage: create_ARM_conda_environment myenv_x86 python=3.9
CONDA_SUBDIR=osx-arm64 conda create -n $@
conda activate $1}
One of the features of Miniforge3 is the ability to define processor specific sub-directories for specific Python environments. For example, by setting CONDA_SUBDIR==osx-64, conda will be instructed to install packages from x86_64 (osx-64) specific sub-directories.
This will enable users to create an environment that installs arm64 or x86_64 (osx-64) Python packages depending on the value defined by CONDA_SUBDIR.
Let’s install two distinct environment using the shortcut previously created, one based on x86_64 (osx-64) and the other arm64 (osx-arm64).
x86_64 (osx-64)
Create a Python 3.9.13 osx-64(x86_64) environment with the name env_x86:
create_x86_conda_environment env_x86 python=3.9.13
Alternatively if you chose not to use a shortcut, you can use the command to achieve the same result as above:
CONDA_SUBDIR==osx-64 conda create -n env_x86 python=3.9.13
conda activate env_x86
arm64 (osx-arm64)
Create a Python 3.9.13 osx-arm64(arm64) environment with the name tensorflow_ARM with the shortcut:
create_ARM_conda_environment tensorflow_ARM python=3.9.13
Alternatively if you chose not to use a shortcut, you can use the command to achieve the same result as above:
CONDA_SUBDIR=osx-arm64 conda create -n tensorflow_ARM python=3.9.13
conda activate tensorflow_ARM
Executing the steps above will install two Python environments using either x86_64 (osx-64) or arm64 (osx-arm64). It is possible to seamlessly switch between these two environments by activating the specific environment with:
conda activate <NAME_OF_ENVIRONMENT>
Let’s verify that an arm64 environment was installed. To do so, we will be installing tensorflow-macos. As previously mentioned, tensorflow-macos can only be executed in arm64 Python environments.
Note: tensorflow will not work in x86_64 Python environments
- Activate the
tensoflow_ARMenvironment with:
conda activate tensorflow_ARM
2. Install arm64 specific tensorflow dependencies.
Note: -c = channel
conda install -c apple tensorflow-deps
3. Install tensorflow libraries:
pip install tensorflow-macos tensorflow-metal
Tensorflow verification
Let’s verify that the tensorflow installation has worked.
- First activate the appropriate environment and launch the python environment.
conda activate tensorflow_ARM && python
2. Import tensorflow and create a constant:
import tensorflow as tf
tf.constant([1,2,3])
3. Let us also check if tensorflow is using GPU acceleration on your machine:
tf.config.list_physical_devices('GPU')
Troubleshooting
One of the most common issue that you may face when installing tensorflow is the error:
[1] 21781 illegal hardware instruction python
This error is caused by installing tensorflow-macos on the wrong conda environment. Ensure you have installed tensoflow-macos on an arm64 conda environment.
Managing Python dependencies has always been difficult. The release of the M1 chip has only added an extra layer of complexity. Until the industry catches up, workarounds such as the methods detailed in this blog will have to suffice.
Hopefully the instructions detailed in this blog have made it easier to manage Python dependencies on your new M1 MacBook.
If you have any issues or questions, please do leave a comment and I will be more than happy to help.
Seamlessly switch between arm64 and x86_64 Python dependencies on M1 Apple Silicon
The release of the M1 Apple Silicon in the new MacBook Pros can be considered one of the biggest generational leaps in chip technology. The new M1 chip, with the improved power and compute efficiency, is based on the arm64 architecture which is unlike previous generations’ Intel x86_64 chips.
While the change have caused many compatibility issues, the M1 chip boasts significantly higher single- and multi-thread performance over its Intel predecessors. This make the M1 MacBook Pro one of the best laptops money can buy for data science-related workloads.
Like many new technologies released by Apple, it often takes some time for the industry to catch up. While we wait for developers to release native support for many of the dependencies we rely on, Apple have released Rosetta to support software that is still based on x86_64 architecture. Nonetheless, for many Python developers like me, it is still common to encounter compatibility issues with our Python environments.
To that end, this blog details the configuration steps I have taken to set up my Python environments on M1 Apple Silicon. At the end of this blog, you will have learned how to configure Python to use arm64 or x86_64 based dependencies.
For the purpose of demonstration, we will be setting up our Python environment for tensorflow-macos as tensorflow-macos is only executable in arm64 Python environments. However, the process detailed here will allow you to install Python packages for both arm64 and x86_64 environments.
There are two specific dependencies that we will need to install first.
- Xcode
- miniforge3
1. Install Xcode:
To install Xcode, first open a terminal session by going to Applications > Utilities > Terminal. Then type in the command:
xcode-select-install
Do note Xcode installation may take a while to install.
2. Install miniforge3
Next, we will be installing Miniforge3. Miniforge3 is the community (conda-forge) driven minimalistic conda installer. Furthermore, Miniforge3 has native support for arm64 based architectures which is definitely advantageous.
To install Miniforge3, download the shell script from here:
Ensure that you select arm64 (Apple Silicon) architecture.
Once you have downloaded the shell script, you may need to enable execution of the shell script with:
chmod +x Miniforge3-MacOSX-arm64.sh
After which, execute the script with:
sh Miniforge3-MacOSX-arm64.sh
Work through the prompts and this will install conda on your machine. We can confirm if we have an installation of conda by using the command:
conda --version
You should get an output as shown below.
Once all dependencies have been installed, we can proceed with configuring conda for arm64 or x86_64 Python environments.
We will begin by adding some shortcuts to the current shell to facilitate the process of installing different conda environments. The snippet of code below will add two shortcut functions that will create either an osx-64 or osx-arm64 conda environment where we can install Python packages.
To do so, add the following code to ~/.zshrc or ~/.bashrc.
# Create x86 conda environment
create_x86_conda_environment () {# example usage: create_x86_conda_environment myenv_x86 python=3.9
CONDA_SUBDIR=osx-64 conda create -n $@
conda activate $1}# Create ARM conda environment
create_ARM_conda_environment () {# example usage: create_ARM_conda_environment myenv_x86 python=3.9
CONDA_SUBDIR=osx-arm64 conda create -n $@
conda activate $1}
One of the features of Miniforge3 is the ability to define processor specific sub-directories for specific Python environments. For example, by setting CONDA_SUBDIR==osx-64, conda will be instructed to install packages from x86_64 (osx-64) specific sub-directories.
This will enable users to create an environment that installs arm64 or x86_64 (osx-64) Python packages depending on the value defined by CONDA_SUBDIR.
Let’s install two distinct environment using the shortcut previously created, one based on x86_64 (osx-64) and the other arm64 (osx-arm64).
x86_64 (osx-64)
Create a Python 3.9.13 osx-64(x86_64) environment with the name env_x86:
create_x86_conda_environment env_x86 python=3.9.13
Alternatively if you chose not to use a shortcut, you can use the command to achieve the same result as above:
CONDA_SUBDIR==osx-64 conda create -n env_x86 python=3.9.13
conda activate env_x86
arm64 (osx-arm64)
Create a Python 3.9.13 osx-arm64(arm64) environment with the name tensorflow_ARM with the shortcut:
create_ARM_conda_environment tensorflow_ARM python=3.9.13
Alternatively if you chose not to use a shortcut, you can use the command to achieve the same result as above:
CONDA_SUBDIR=osx-arm64 conda create -n tensorflow_ARM python=3.9.13
conda activate tensorflow_ARM
Executing the steps above will install two Python environments using either x86_64 (osx-64) or arm64 (osx-arm64). It is possible to seamlessly switch between these two environments by activating the specific environment with:
conda activate <NAME_OF_ENVIRONMENT>
Let’s verify that an arm64 environment was installed. To do so, we will be installing tensorflow-macos. As previously mentioned, tensorflow-macos can only be executed in arm64 Python environments.
Note: tensorflow will not work in x86_64 Python environments
- Activate the
tensoflow_ARMenvironment with:
conda activate tensorflow_ARM
2. Install arm64 specific tensorflow dependencies.
Note: -c = channel
conda install -c apple tensorflow-deps
3. Install tensorflow libraries:
pip install tensorflow-macos tensorflow-metal
Tensorflow verification
Let’s verify that the tensorflow installation has worked.
- First activate the appropriate environment and launch the python environment.
conda activate tensorflow_ARM && python
2. Import tensorflow and create a constant:
import tensorflow as tf
tf.constant([1,2,3])
3. Let us also check if tensorflow is using GPU acceleration on your machine:
tf.config.list_physical_devices('GPU')
Troubleshooting
One of the most common issue that you may face when installing tensorflow is the error:
[1] 21781 illegal hardware instruction python
This error is caused by installing tensorflow-macos on the wrong conda environment. Ensure you have installed tensoflow-macos on an arm64 conda environment.
Managing Python dependencies has always been difficult. The release of the M1 chip has only added an extra layer of complexity. Until the industry catches up, workarounds such as the methods detailed in this blog will have to suffice.
Hopefully the instructions detailed in this blog have made it easier to manage Python dependencies on your new M1 MacBook.
If you have any issues or questions, please do leave a comment and I will be more than happy to help.
Denial of responsibility! Techno Blender is an automatic aggregator of the all world’s media. In each content, the hyperlink to the primary source is specified. All trademarks belong to their rightful owners, all materials to their authors. If you are the owner of the content and do not want us to publish your materials, please contact us by email – [email protected]. The content will be deleted within 24 hours.